Skip to product information
1 of 8

6-Panel Screen Hanger Kit

6-Panel Screen Hanger Kit

Regular price $92 USD
Regular price Sale price $92 USD
Unit price $92.00  per  item
Sale Sold out
Shipping calculated at checkout.
Material & Color
Size

Available in satin black steel OR high-density clear Lucite. These unobtrusive hangers provide a safe and tasteful way to hang folding screens. They have been specifically designed for hanging traditional Japanese folding screens (byobu) on drywall.  Used by museums, art galleries & installers, and collectors for over 25 years.


In the Box

This 6-Panel Screen Hanger Kit includes
  • 5 Top Clips
  • 5 Bottom Clips
  • 2 Side Clips
  • Nails

Advice on Size

The channel of each bracket measures 3/4". This accommodates most traditional Japanese screens with lacquer edging. If your screen is thinner than this, a piece of acid-free matboard or paper can be used to line the back of the channel so that it sits snugly in place.

Advice on Color

For a standard screen with a black lacquer edge, we recommend using black brackets. If your lacquer edging is a natural wood, orange, red, or other color, we recommend the clear brackets.

Installing a 6-panel Japanese screen (byobu) with screen clips:

  1. Position your bottom row of screen brackets in the center of each fold. Use the double sided positioning tape on the back of the brackets. Once they are level and straight, nail them into place. Place the screen in the channel created by the screen brackets.
  2. Have someone hold the screen in place (place pressure along the folds where there are wooden supports beneath the paper/silk). Use a tissue or soft cloth to protect the surface from oils on your hands. Slide the top bracket over the top edge, placed at each fold and nail into place.
  3. Position the side brackets, one at either end in the center of the screen height and nail it in place. The installation is complete!

Print Instructions

View full details

How to Hang a Japanese Folding Screen:
The Ultimate Mounting Kit

Step-by-Step Guide

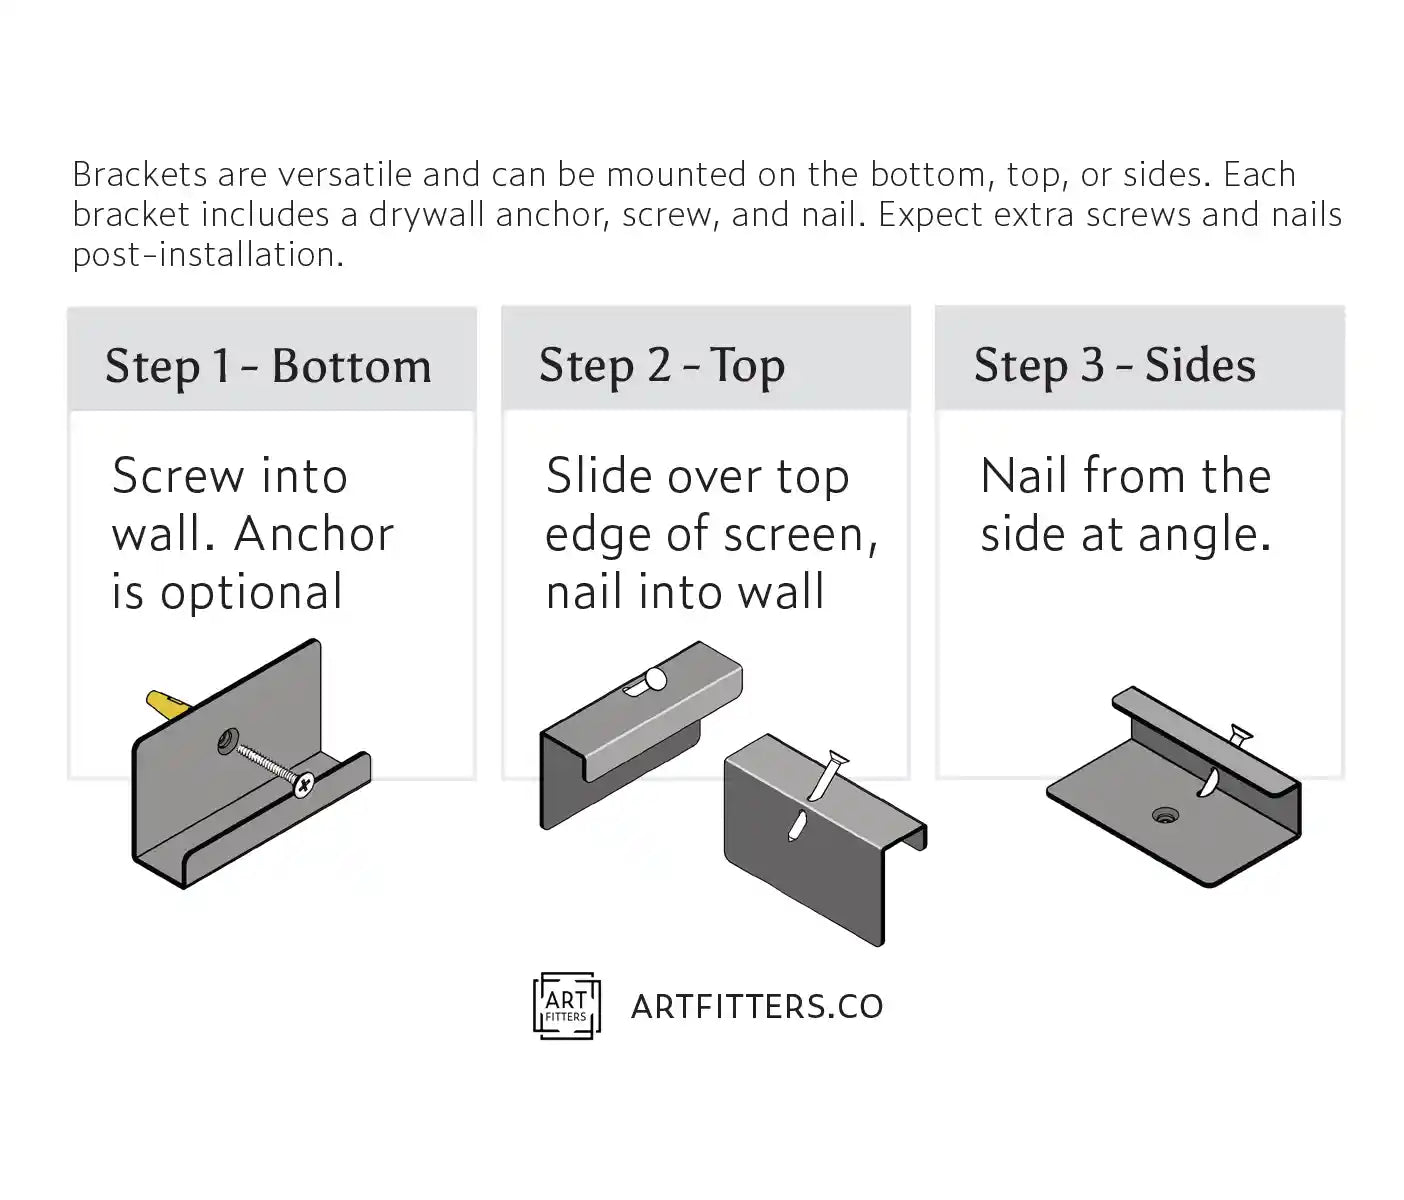
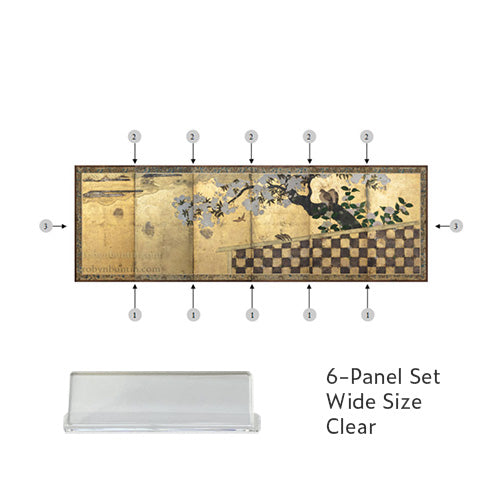
  1. Position your bottom row of screen clips, in the middle of each panel. The double-sided tape will allow you to adjust the placement of each clip until it’s level and straight. Nail into place. Lift with a partner to place the screen in the channel created by the screen clips.
  2. Have someone hold the screen in position - apply minimal pressure along the fold where there are wooden supports beneath the paper/silk. Use a tissue or soft cloth to protect the surface from oils on your hands. Slide the top clip over the top edging, parallel to the bottom clips and nail into place.
  3. Position the side clips, one at either end in the center of the screen height and nail it in place. The installation is complete